Handles (straps)
We call these "handles", but all over the world "straps" is used as well. Handles are used to grab the flying lines without hurting your hands. There are three different methods we use:
|
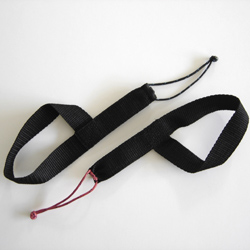
1. Standard handles - basics straps:
These are made of small nylon ribbons that are folded and stitched together at the top side. At the top is also a piece of rope with a knot, allowing us to connect our flying lines with a simple lark's head.
|
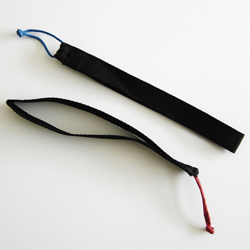
2. Handles with wrist fitting - Nils straps:
These handles are an invention by Nils Delacourt. These are shaped to fit exactly around your wrists, thus preventing them from sliding or even dropping out of your grip.
|

3. Indoor or low wind handles:
Also called "finger straps" because there are 2 openings where you put two fingers in. Some prefer to use the point and middle finger, others swear by pinkie and ring finger. Test it out to see what you like best! These straps are very short, to prevent the weight of the handles having a bad influence on the light flying lines.
|
.jpg)
4. Combination handles:
Andre Van Den Brink had the idea to make handles into a combination, so you get all the benefits in one combination. They are made to fit. So you can choose, when at the kite field, between fitting wrist or finger straps at will without having to change handles. Brilliant! |
Make your own handles:
If you can build your own kite, you can build your own handles as well. Biggest advantage is that they can be made to fit your needs (and wrists). Click on the second menu items above to get all the info.
materials:
- Nylon ribbon 25mm wide (like carrying straps for sports bags). You can find these in most sewing shops and they are rather cheap.
- A sewing machine.
- 100% polyester thread.
- A strong rope, best is nylon.
- A big stopper needle (the one you used for the leech line in your kite)
|