Step 1: The upper leg and the lower leg of the bridle
Preparing the bridle line for upper and lower leg
1. Make a knot at 5 mm from the end of the bridle line. Melt the excessive part with the flame of a lighter (or a candle). Tap the molten end onto a hard object to flatten the end against the knot.
2. Make a second knot at 1045 mm from the first and cut the bridle line 5 mm past that knot. Again, melt the excessive part with the flame of a lighter (or a candle). Tap the molten end onto a hard object to flatten the end against the knot.
3. Repeat step 1 and 2 so you have two equally long pieces of bridle line with knots at all ends.
|

4. Put a ruler on the table and put both bridle lines next to it. Put a mark with a felt tip at 535 mm on both bridle lines to show the length of the Upper leg.
|
|
Knotting the upper and lower leg to the frame.
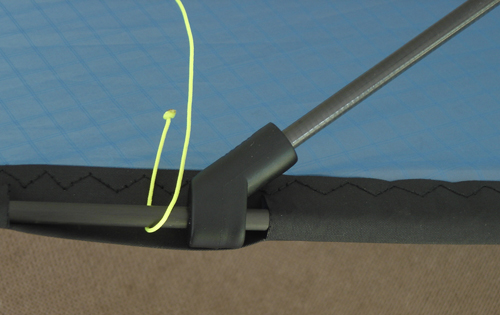
1. Take the end of one of the bridle lines at the side of the Lower leg.
2. Put the end of the bridle line between the spar and the Dacron, below the lower APA-connector.
|
|

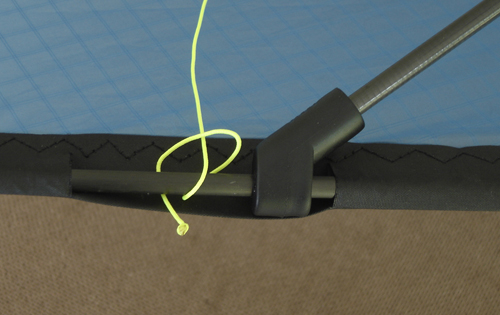
3. Put the end of the bridle line over the line at the inside of the kite. Do this from top to bottom (the pictures have the top of the kite at the right side).
|
|
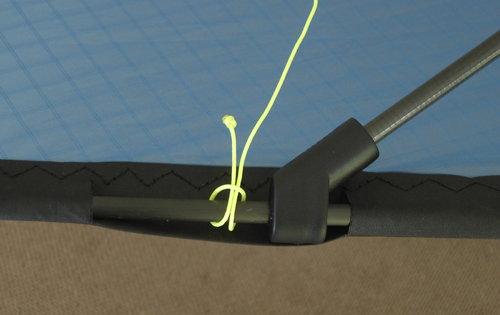
4. Now slide the end of the bridle line between the Dacron and the spar from the inside to the outside.
|
|
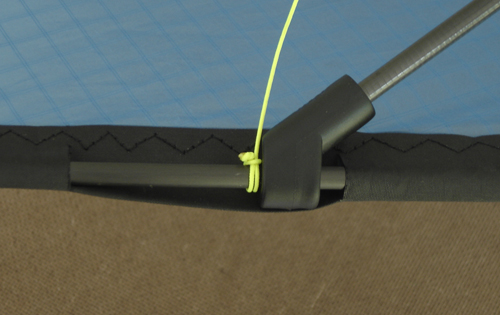
5. Put the end of the bridle line inside the loop and pull the other end of the bridle line. This will close the knot against the end knot of the bridle line.
6. Repeat this step for the other side of the kite. Then do the same for the connection above the Upper APA-connection with the other end of the bridle line. The knot sits above the APA.
You should now have two lengths of bridle line hanging on the kite, each one connecting the leading edge from above the top APA to below the bottom APA on one side of the kite.
|
|