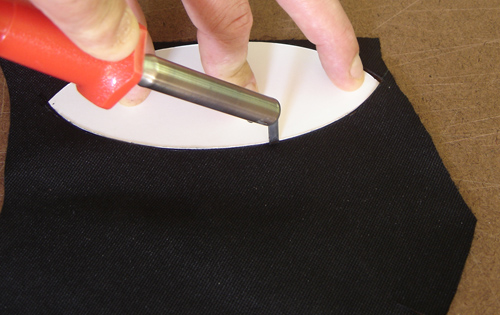
1. Cut off the excessive parts of the leading edges with a soldering iron.
|
2. Cut the fortification out of an old sports bag or car safety belt.
|
|

3. Mark the axis of the fortification over the whole length and also the centre. Mark the centre of the nose bag.
|
|

4. Glue the fortification on the sail and apply enough pressure. Check if the marks are aligned.
|
|

5. We use paper tape as a reference for the sewing. The first piece of tape is aligned with the sewing of the nose bag. The second piece marks the sewing of the leading edges.
6. The sewing is in 4 steps, always with a straight seam. To stay clear about this, we marked steps 3 and 4 on the other side of the nose. It's meant to be sewed 4 steps at one side at a time :-)
|
|

A. Start at the last three steps zigzag seam on the leading edge and sew up to the piece of tape you put over the nose bag.
B. Turn the sail and sew to just over the edge of the fortification following the paper tape.
C. Turn the sail 180° and sew again the last piece you just did. Remove the paper tape that aligns with the leading edge and continue your sewing right at the top of the fortification.
D. Turn the sail and sew the fortification at 1 mm from the border of the leading edge.
|
It is best to return 3 steps of the sewing at the end of the seam, that will make the sewing stronger.
7. Repeat the above for the other side of the nose.
8. Cut the excessive parts of the fortification with a soldering iron, without cutting into the leading edges!
|
|
|
|
