Step 15: Marking the leading edges and the nose bag
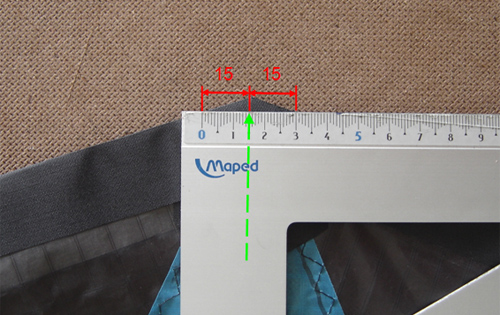
1. Put the sail down with the front side upwards and the nose close to you.
2. Draw a vertical line in the centre of the seam from the spine to the top where the two leading edges meet (green arrow). Slide the ruler down until the top of both leading edges is visible for 15 mm. At that spot, draw a horizontal line.
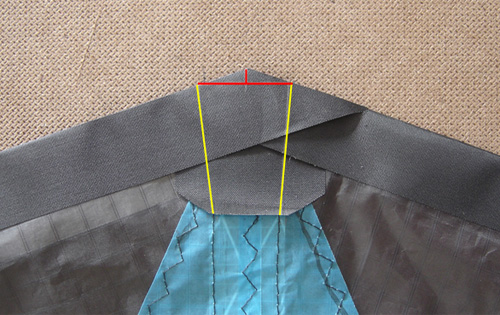
3. Connect both ends of that horizontal line with the sewing of the Mylar/Ripstop that fortifies the spine (yellow lines).
|