Step 12: Sewing of the spine tunnel
The spine tunnel is the piece of Velcro that is sewn to the back of the kite to connect the spine at the bottom part of the sail
1. Put the sail with the back side up and the tail close to you.
2. Cut some Velcro from the hard side of 40mm long en 25mm wide.
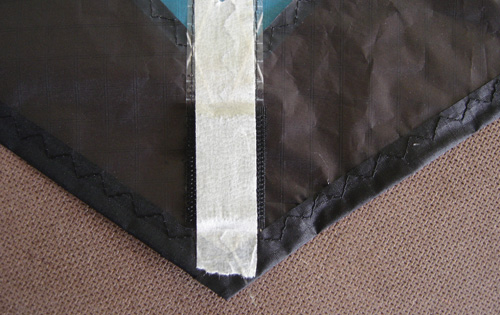
3. Fix the piece of Velcro just above the trailing edge on the Mylar/Ripstop that strengthens the spine. Use paper tape to do this.
Watch Out: Make sure the tape is not wider than 19 mm, so you have room to sew next to the tape.
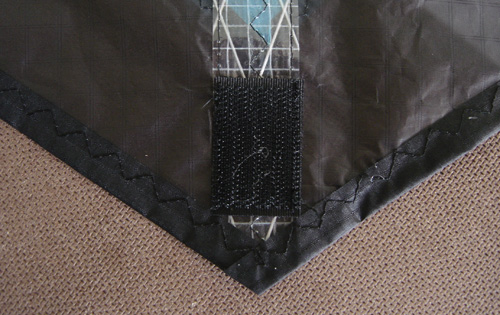
4. Sew the Velcro with a straight seam at about 1 mm from the border. At the start and at the end you sew 3 steps forward and 3 steps backwards.
|