Toms Kite Building Site

building your own trickkite

The Sail

step 8: Sewing the fortification for the spine and stand-offs

step 9: Glueing and sewing of the fortification for the upper spreader

step 10: Glueing and sewing the Ripstop for the “trailing edges”

step 11: Glueing of the nose bag

step 12: Sewing of the spine tunnel

step 13: Glueing and sewing of the fortification for the central-T

step 14: Glueing of the leading edges

step 15: Marking the leading edges and the nosebag

step 16: Sewing of the leading edges and the nosebag

step 17: Inserting the leechline

step 18: Glueing and sewing of the fortification of the nose

step 19: Cutting out the space for the yoyo stoppers

step 20: The holes for tensioning the leading edges and placing the stand-offs

Step 8: Sewing the fortification for the spine and stand-offs


1. Turn the sail with the front side up and sew the seam of the two sail halves with a three steps zigzag seam.


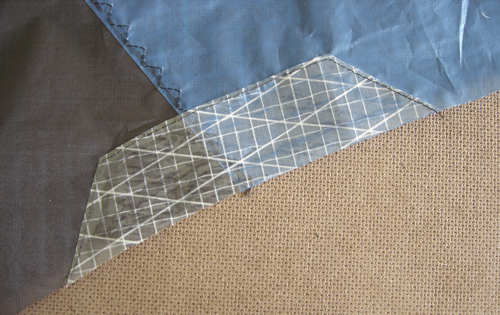
2. Turn the sail with the back side up and sew the Mylar/Rip stop at 1 to 1,5mm from the border with a straight seam. Repeat this for the other side of the fortification.


3. Sew the fortification for the stand-offs at 1 to 1,5mm from the border with a straight seam.


EXTRA: Tune the seam distance between two holes to be 3 mm, to get a nice result.