Toms Kite Building Site

building your own trickkite

The Sail

step 9: Glueing and sewing of the fortification for the upper spreader

step 10: Glueing and sewing the Ripstop for the “trailing edges”

step 11: Glueing of the nose bag

step 12: Sewing of the spine tunnel

step 13: Glueing and sewing of the fortification for the central-T

step 14: Glueing of the leading edges

step 15: Marking the leading edges and the nosebag

step 16: Sewing of the leading edges and the nosebag

step 17: Inserting the leechline

step 18: Glueing and sewing of the fortification of the nose

step 19: Cutting out the space for the yoyo stoppers

step 20: The holes for tensioning the leading edges and placing the stand-offs

Step 9: Glueing and sewing of the fortification for the upper spreader


1. Put the sail with the front side up align with the plan and fix with paper tape.


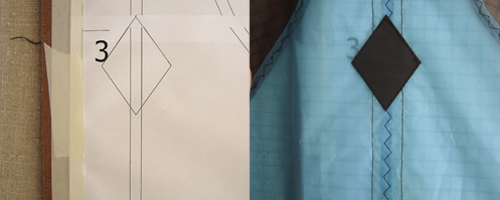
2. Take the fortification for the upper spreader (trapezium shaped piece of Dacron) and glue this on the marked spot of the plan.


3. Sew the fortification for the upper spreader at 1 to 1,5mm from the border with a straight seam.