Step 4: Sewing the two halves of the sail

The sewing of the sail is best done with a "three step zigzag seam" or a "waved seam" and a "needle number 80".
Watch Out: Tune your sewing machine to have the width and the length of the zigzag seam the same.
1. Put down the right half of the sail with the front side up.
2. First we sew the seams that aren't completely across the sail. To do this we start at the outside of the sail. We stop the "three step zigzag seam" or the "waved seam" at the outside of the seam we cross.

Watch Out: Make sure the needle is still in the sail when you lift the foot of the machine.
3. While the needle stays in the sail we change the machine from three step zigzag seam mode to a "straight seam".
4. Turn the sail to get the front side of the foot in alignment of the last part of the zigzag seam you just finished.

5. Put the foot down and sew by hand (turn on the wheel of the machine with your hand to sew) three stitches back in the holes you made with the three step zigzag seam.
6. Turn the sail upside down and pull out the last stitch.
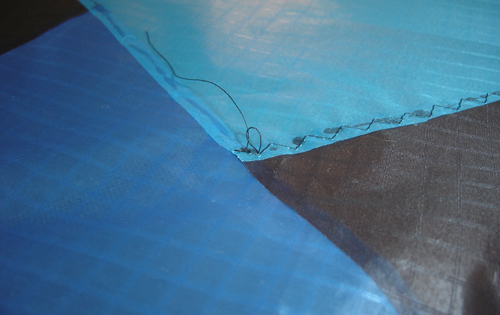
7. Knot together both thread ends and cut these 1mm away from the knot.

8. If all those seams that stop in another seam are done, you can sew the seams that run completely over the sail, starting from the outside.
Watch Out: Sew the sail always with the front side up.
Don't forget to regularly check out the seam. Don't forget to remove left over thread immediately.
|